If your screen captures or background images are already in a folder, AppMockUp Studio can turn them into Main Screenshots in one go: one new screenshot per image.
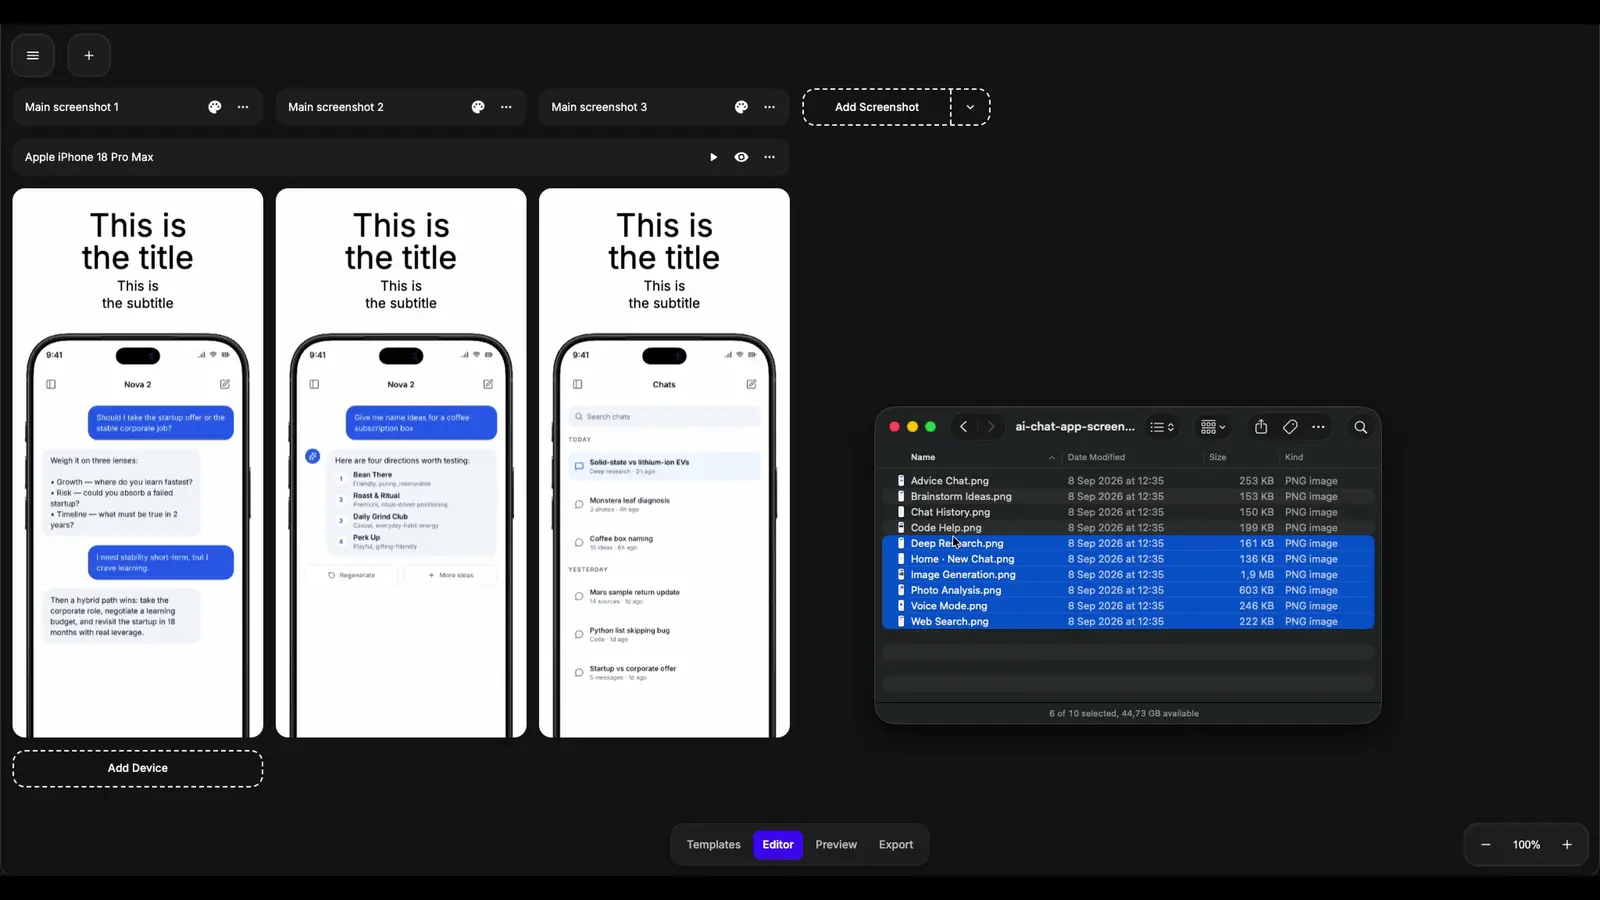
Create Screenshots from Images
- Select the image files on your computer.
- Drag them onto the ' Add Screenshot ' button, or onto an empty part of the stage, and drop them.
- In the dialog, choose how the images are used:
- Device screen: each image fills the device in a fresh screenshot made from the normal template. This is preselected when the image has the same shape as the device's screen capture.
- Background: each image becomes the screenshot's background fill, with the layers on top.
- Confirm, and one Main Screenshot is created per image.
From the Clipboard
Copy an image in a browser, in Figma or in a screenshot tool, make sure nothing is selected in AppMockUp Studio, and press Ctrl/Cmd + V. The same dialog offers to make a new screenshot from the image.
Pro Tips:
A batch is one undo step: Ctrl/Cmd + Z takes every screenshot it created back at once.
A file that cannot be read adds nothing, rather than a broken screenshot.
To add several blank screenshots instead, see How to Add a Main Screenshot.